| Friends Of The Little Bighorn Battlefield |
The Next Generation In The Study Of Custer's Last Stand |
Fetterman Battlefield Tour |
| • The Battle • Archeology • Memorials • Little Bighorn Store • News • Book Reviews |
More to See >>
By Bob Reece
360 degree view of Fetterman Battle Ridge
Photo taken north of the Fetterman Monument, which can be seen in the far left photo looking south. Views move left to right -- south, west, north, east
1.
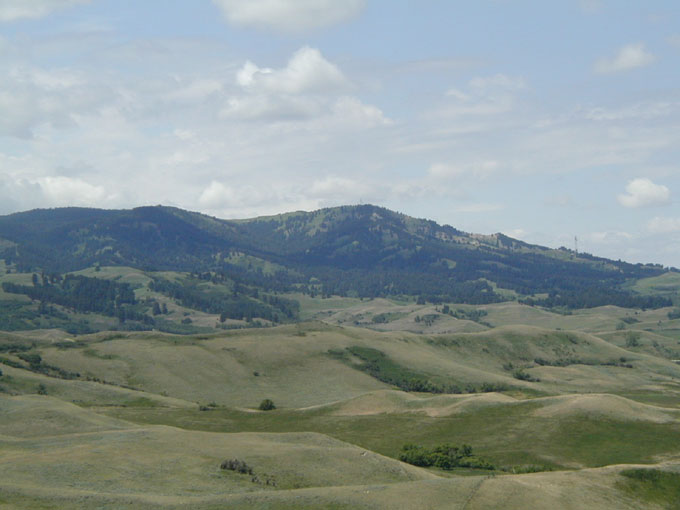
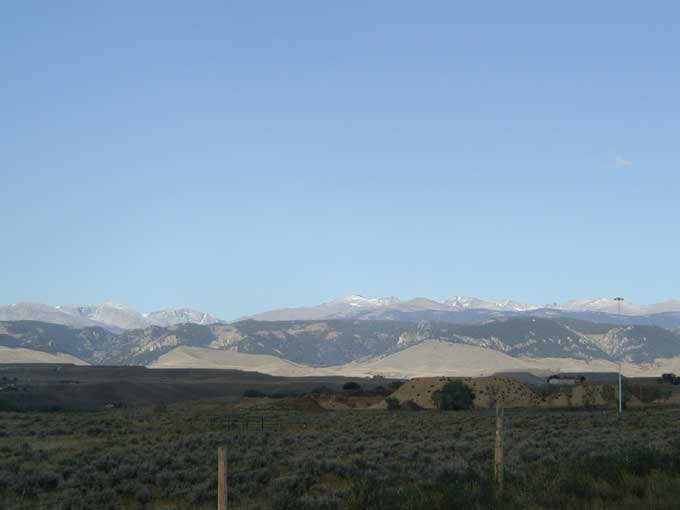
Picture 1 looks NW -- The battlefield is located in one of the most beautiful spots on earth. It's nestled against the foothills of the Bighorn Mountains, along Interstate 90, with Cloud Peak standing above all others. Picture 1a looks west -- A view of Cloud Peak from near Buffalo, Wyoming.
2.
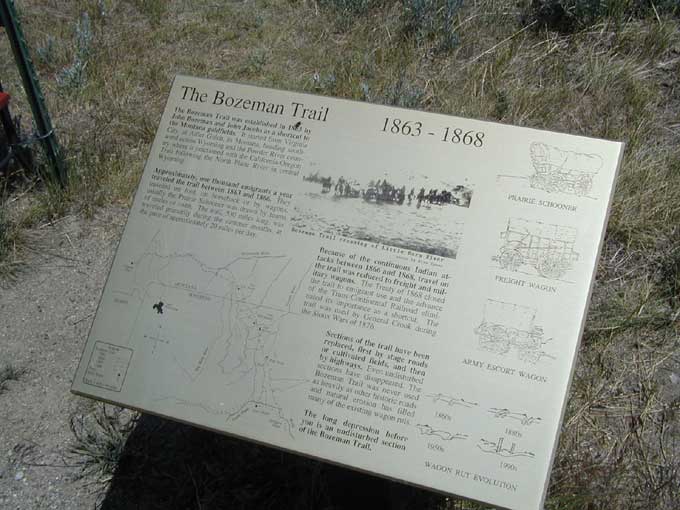
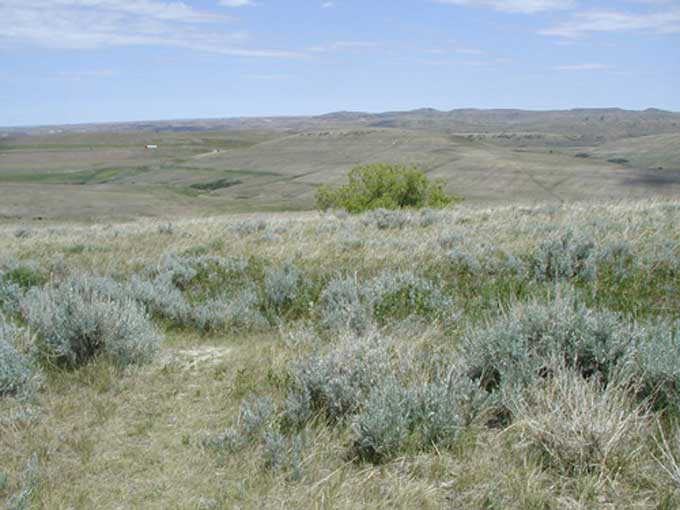
Picture 2 -- A wayside exhibit tells the story of the Bozeman Trail. Picture 3 looks east -- The battlefield cuts through the Bozeman Trail. Some of the ruts, of the old road, can still be seen today.
4.
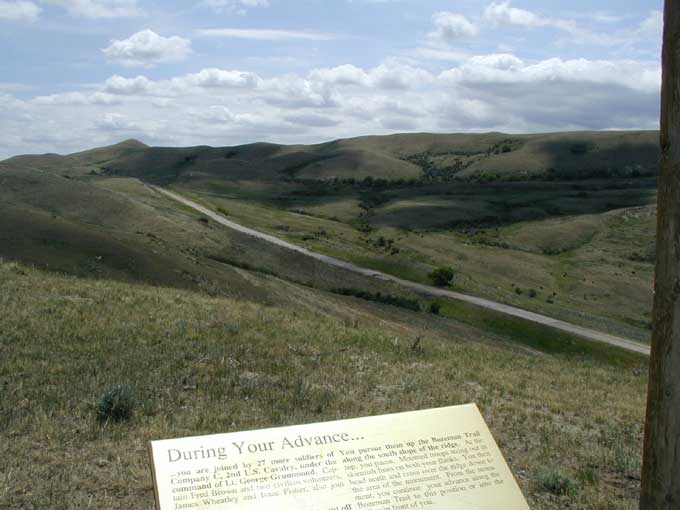
Picture 4 looks SW --December 21, 1866, Fetterman led his troops across Lodge Trail Ridge, which can be seen in the center of this photo.
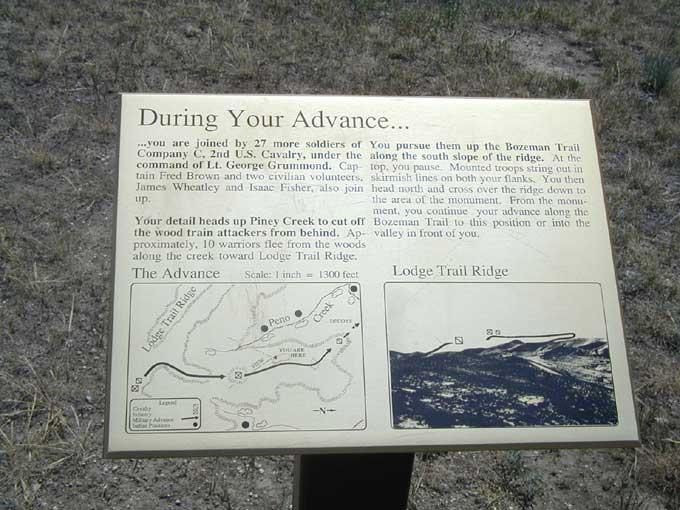
5.
Picture 5 -- A close-up view of the wayside exhibit that discusses Fetterman's advance.
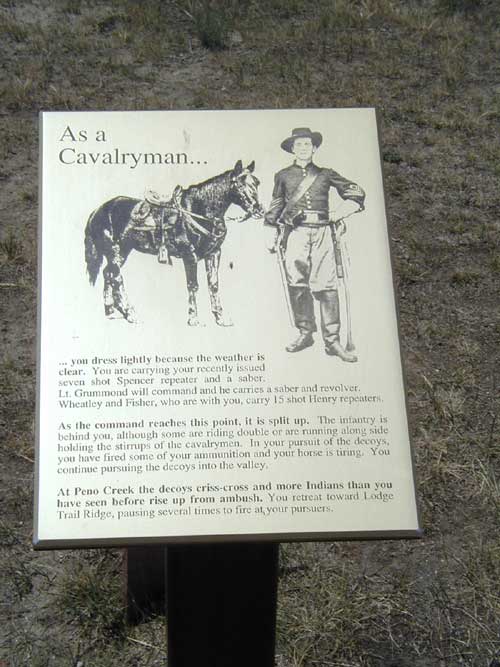
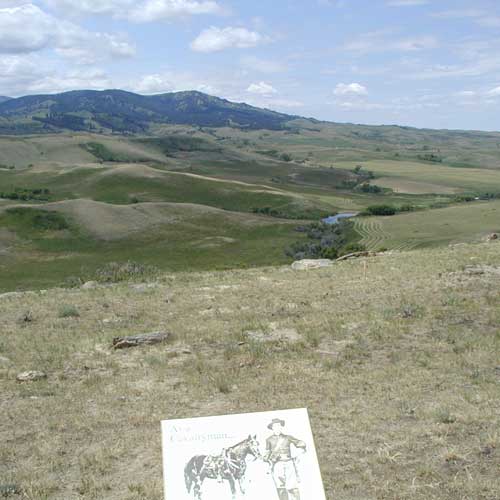
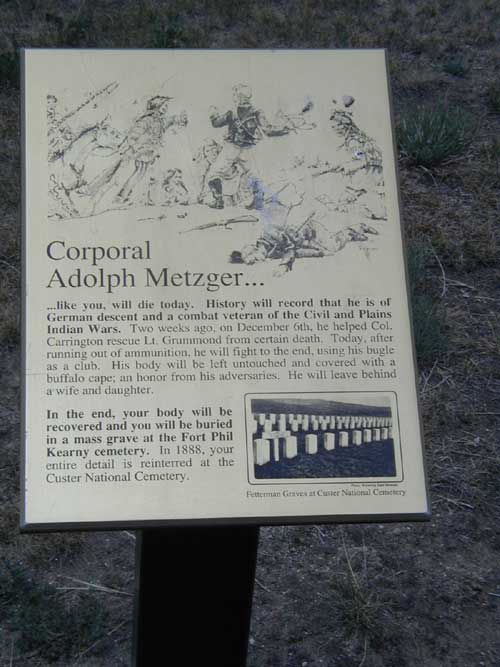
6.
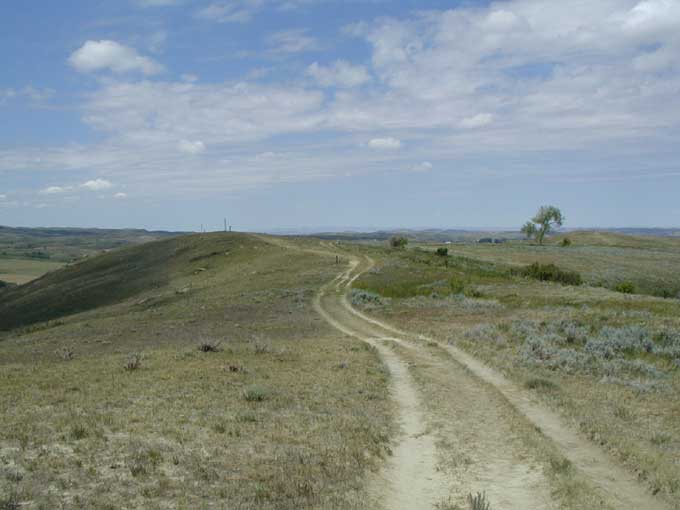
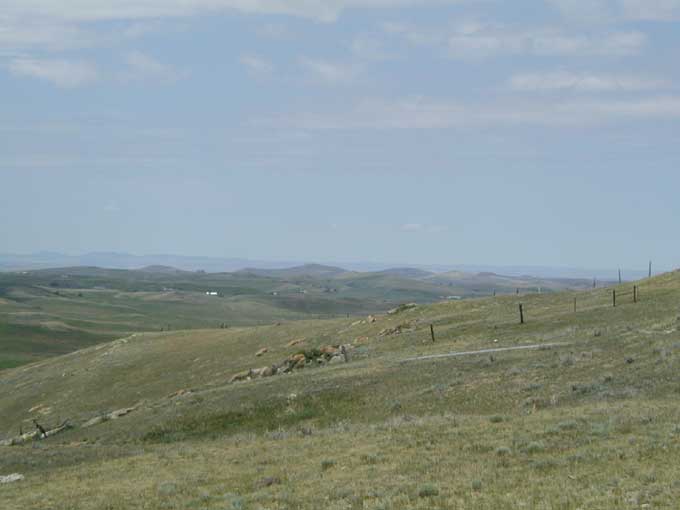
Picture 6 -- The cavalry quickly moved north, far beyond the infantry. Picture 7 looks NW -- This is the general area where the cavalry moved north. Picture 8 looks north -- The extreme north end of battle ridge.
9.
Picture 9 looks north -- The slower moving infantry kept up with the cavalry as best they could. Some of the hardiest of the infantry grabbed hold of a cavalry horses' stirrup to move faster. The main portion of the infantry reached this point, about the middle of battle ridge. Nearly 2,000 Sioux and Cheyenne warriors waited in ambush, hidden behind rocks, inside ravines, and coulees. When the moment was right they would spring up and attack from...
the east...
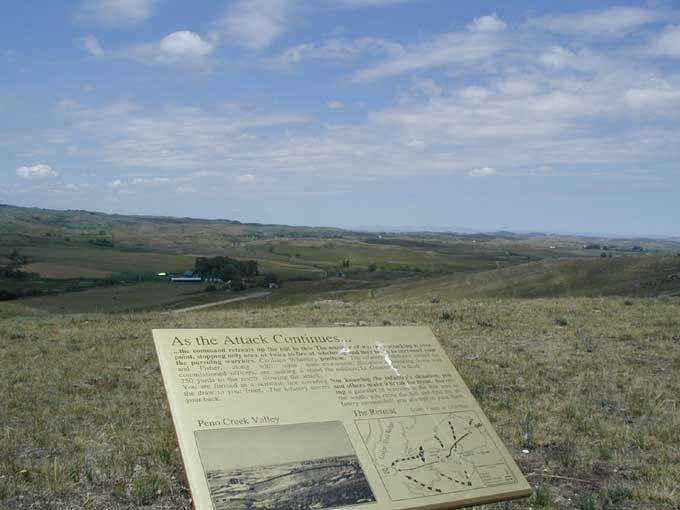
the west...
and the north.With the attack in full swing, most of the soldiers attempted to move south -- the direction of Fort Phil Kearny. Civilians James Wheatley and Isaac Fisher with their new Henry repeating rifles, along with a handful of soldiers would stand their ground far north along the ridge behind boulders. 10.
Picture 10 looks north -- Just beyond this first ridge, on private property, stand the Wheatley/Fisher rocks.
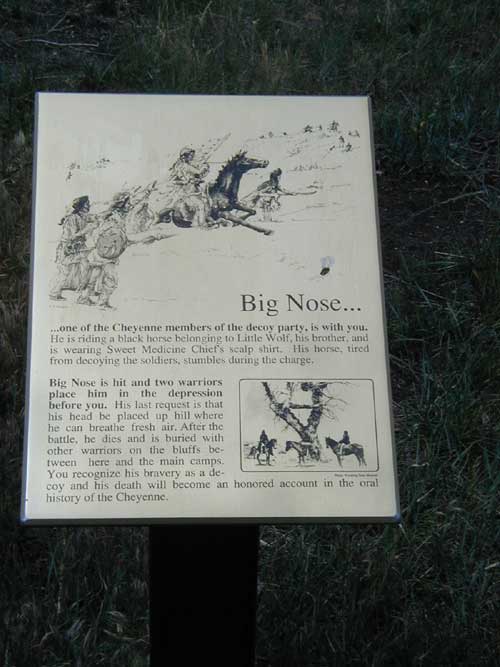
11.
Picture 11 -- A wayside for the Cheyenne warrior, Big Nose, who was part of the decoy party and killed fighting in the far north portion of battle ridge.
12.
Picture 12 looks north -- The general area where Big Nose charged and was killed.
13.
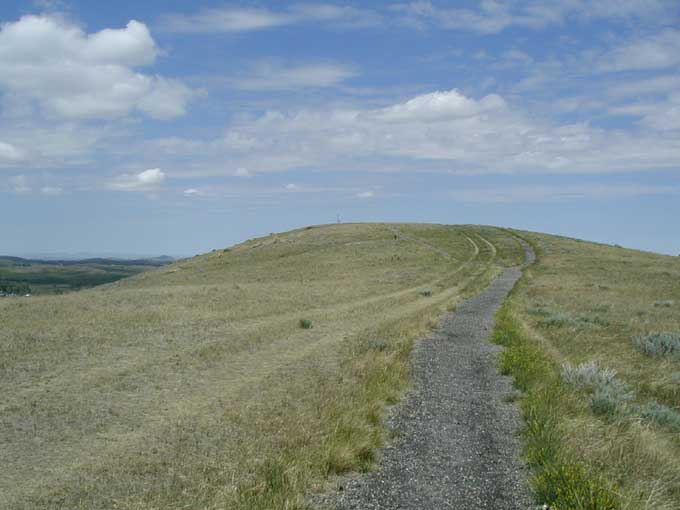
Picture 13 looks NW -- The cavalry quickly passed the infantry but was stopped and overrun by warriors at this location, Cavalry Hill, not far from where the monument stands today.
14.
Picture 14 looks north -- A view of Cavalry Hill. This photo was taken halfway between Cavalry Hill and the Fetterman Monument.
15.
Picture 15 The Fetterman Battlefield Monument was dedicated on July 3, 1908-- Inside the rock wall, surrounding the monument, are large boulders. It was somewhere among these boulders that the bodies of Captains William Fetterman and Frederick Brown were found. The story has long been told that Fetterman and Brown committed suicide by shooting each other in the head. However, Assistant Surgeon Samuel M. Horton examined Fetterman's wounds and confirmed that Fetterman did not commit suicide. Horton's official report stated, "Col. Fetterman's body showed his thorax to have been cut crosswise with a knife, deep into the viscera...I believe that mutilation caused his death." Regarding Brown, Surgeon Horton stated, "...a hole made in his left temple by a small pistol ball; the latter most probably caused his death." It's probable that Brown committed suicide. An Oglala warrior, American Horse, later explained that he ran an officer down with his horse. After dismounting, American Horse hit the officer with his club then cut the throat with his knife. This happened among the rocks at the top of the hill. This could very well be the boulders where Fetterman and Brown were found dead. American Horse's description of his killing of the soldier and the wounds that the surgeon found on Fetterman matched such an attack.
The remaining soldiers and civilians, left inside the fort, could hear the gunfire from the battle. Col Carrington sent Captain Tenedor Ten Eyck with over 50 men, as well as ambulance wagons, to relieve Fetterman. Ten Eyck made it to the high hills south of the battlefield from which he could easily observe battle ridge. As warriors finished their fight against Fetterman, they spotted Ten Eyck. The warriors taunted these new soldiers to come down and fight. There is no explanation why the warriors did not pursue and destroy Ten Eyck, which they could have easily accomplished. Instead, the Indians left the battlefield to the southeast. Ten Eyck moved his force toward battle ridge. As he came closer a handful of warriors still boldly remained, but Ten Eyck fired upon them forcing them to leave the field. Moving slowly and gingerly, the full length of the battlefield, the relief party witnessed a scene of horror; none of the Fetterman soldiers made it out alive.
16.
Picture 16 -- The Metzger wayside exhibit. Almost all the soldiers were mutilated beyond recognition. However, one bugler was found totally intact and covered with a buffalo robe. Corp Adolph Metzger fought bravely after running out of ammunition using his bugle as a weapon. Most likely the warriors who fought and killed him covered Metzger with the robe and stayed beside his body to ensure it was not mutilated. Dusk came early, on the shortest day of the year, when Ten Eyck's force rode through the gates of Ft. Phil Kearny, their wagons loaded with about 50 remains. Carrington and crew went out the next day to bring in the remainder of the bodies. They were buried at the fort cemetery December 24, where they laid in rest until 1888 when the remains were disinterred and buried on Last Stand Hill at the Little Bighorn Battlefield. You can view photos of their burial location on Last Stand Hill. More skirmishes and battles followed during the summer of 1867, but Red Cloud's war would finally come to an end resulting in a great victory for Red Cloud and his folk. The United States Government lost its only Indian war, of all its Indian wars, against Red Cloud. The result was the Treaty of 1868 and the promise that the U.S. Army would abandon its forts along the Bozeman Trail, which it did. The soldiers were barely over the first hill, as they left the fort for the last time, when they looked back. Before their eyes they saw thousands of Indians moving from the hills and valleys. But, these Indians weren't coming to fight; they were about to celebrate their great victory. Soon, Fort Phil Kearny was ablaze with fire. Flames and smoke rose high in the air while whoops of celebration could be heard coming from the Indians. The soldiers averted their eyes, turned their heads southeast, and moved on. Webmaster's Note: Thanks to Friends' member, Craig Fischer for his help with research for this tour. For a synopsis of the Fetterman Battle please read Bill Price's, "The Fetterman Battle." The Fetterman Battlefield is located north of Buffalo, Wyoming near the site of Fort Phil Kearny. To learn more about the fort, its history, and current events please visit the Fort Phil Kearny / Bozeman Trail Association. On June 25, 2004, the National Park Service with assistance from Friends of the Little Bighorn Battlefield reburied the remains of an unknown person, from the Fort Phil Kearny post cemetery, at the Custer National Cemetery. You can read about it in our 2004 Summer Events section of this website.
John Monnett's newest book about the Fetterman Fight,
Where a Hundred Soldiers Were Killed: The Struggle for the Powder River Country in 1866 and the Making of the Fetterman Myth
Fetterman Battle HomeBecome A Member Of The FriendsNews & Information Home |
||
|
Copyright 1999-2013 Bob Reece Friends Little Bighorn Battlefield, P.O. Box 636, Crow Agency, MT 59022 | Home |
Board of Directors |
Guest Book | Contact | Site Map
| |